LED strip lights have become one of the most popular lighting solutions for modern homes, offices, and commercial spaces due to their flexibility, energy efficiency, and sleek appearance. These lighting strips are designed to deliver consistent brightness while consuming less power compared to traditional lighting options. From decorative accents to functional task lighting, flexible LED lighting adapts easily to different environments and design needs. With advancements in energy-efficient lighting, users can now enjoy longer lifespan, reduced maintenance, and lower electricity costs. Whether used indoors or outdoors, customizable lighting solutions allow seamless installation and creative freedom, making LED strip lights an ideal choice for contemporary lighting projects.
1. Understand the properties of the light strip
Before buying LED strip lights, it is important to understand how they work and what features matter most. LED light strip brightness is usually measured in lumens. A higher lumen LED strip produces brighter light, while a lower lumen output is better for ambient ceiling lighting and indirect ceiling lighting.
LED strip color temperature also plays a major role in mood and comfort. A warm white LED strip around 2700K to 3000K creates a cozy feeling. A cool white LED strip around 6000K to 6500K gives a clean and modern look. Choosing the best color temperature for ceiling LED lights depends on the room’s purpose.
Color quality matters as well. A high CRI LED strip with a strong LED CRI rating above 90 shows colors more naturally. LED density per meter is another key factor. Higher density means smoother and more even lighting with fewer visible light points.
RGB LED strip lights allow color changes and effects. These strips require an RGB LED controller and often support LED strip remote control or smart LED strip app control. This makes them perfect for mood lighting and entertainment rooms.
2. Measure and plan:
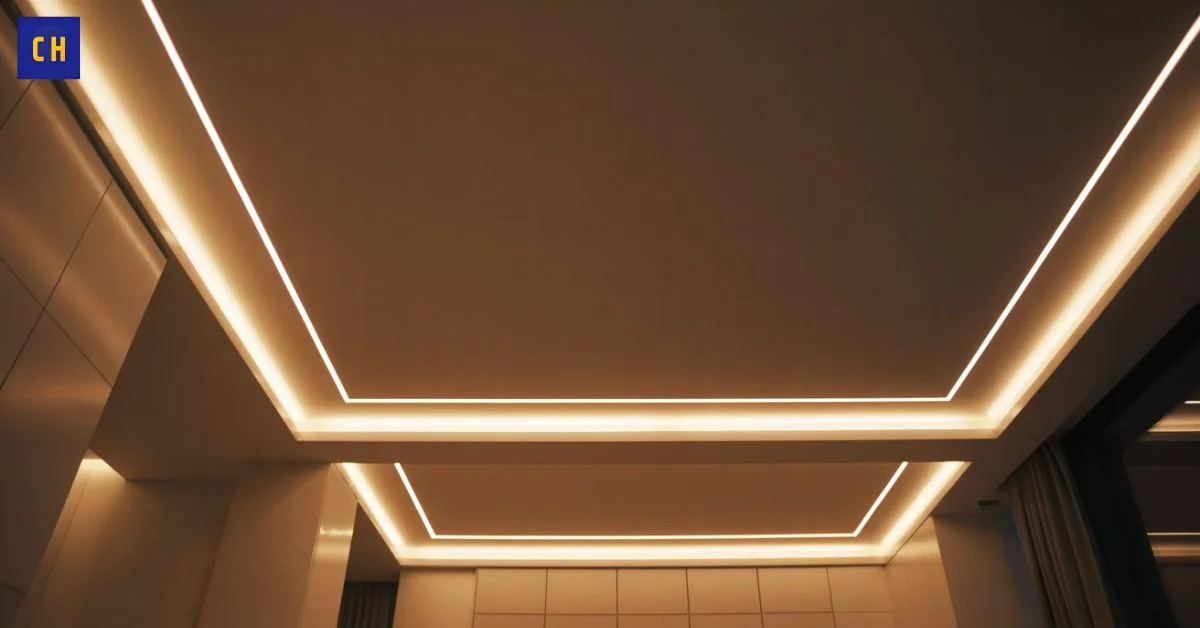
Good results always start with good planning. A ceiling LED strip planning guide begins with measuring the full perimeter of the ceiling. This ensures the LED strip length matches the space without gaps or overlaps.
Deciding placement is equally important. Many people choose ceiling cove lighting by placing the strip slightly hidden at the ceiling edge. This method produces soft indirect ceiling lighting and avoids glare. Planning also helps with LED strip voltage selection guide decisions, such as choosing between a 12V LED strip or a 24V LED strip. Longer runs usually work better with 24V because voltage drop is reduced.
This planning step is essential for safe LED strip installation and long-term performance.
3. Prepare tools and materials
Installing LED strip lights is simple when the right tools are ready. Clean surfaces help adhesive backing stick better and improve LED strip heat dissipation. Alcohol wipes are commonly used for this step.
Power planning is also critical. LED strip wattage per meter determines how strong the LED power adapter must be. For example, a strip rated at 15 watts per meter over five meters requires at least 75 watts of power, plus extra capacity for safety.
Below is a simple reference table for power selection.
| Strip Length | Wattage per Meter | Minimum Power Adapter |
|---|---|---|
| 3 meters | 12W | 40W |
| 5 meters | 15W | 90W |
| 10 meters | 10W | 120W |
Using proper LED strip connectors ensures reliable connections when extending strips.
4. Installation
Knowing how to install LED strip lights on ceiling correctly prevents future issues. The surface must be dry and smooth. The strip should be applied slowly and evenly without bending LED chips.
When installing in kitchens or bathrooms, a waterproof LED strip is necessary. An IP65 LED strip or IP67 LED strip protects against moisture and steam. This makes LED strip lights for bathrooms safe and long-lasting when installed correctly.
Connecting multiple strips requires attention to LED strip controller compatibility. RGB systems need matching controllers, while single-color strips use simpler setups. Correct connections also reduce voltage loss and flickering.
5. Testing
Testing is a step many people skip, but it is very important. Power should be turned on before final mounting is complete. This helps identify wiring problems early.
Testing confirms brightness, color accuracy, and controller response. Smart LED strip app control should respond smoothly. LED strip brightness for ambient lighting should feel comfortable and not harsh.
If the LED strip not lighting up solution is needed, checking polarity, connectors, and power rating usually solves the issue.
6. Caution express
LED strip lights are safe when installed properly, but some precautions are necessary. Overheating can shorten lifespan, so airflow matters. LED strip heat dissipation should never be blocked by insulation or thick coverings.
Voltage mismatch is another common problem. The LED power adapter must always match strip voltage. Water exposure requires proper waterproof ratings. Using indoor strips outdoors or in wet areas can cause failure or safety risks.
A simple rule applies. If something feels forced, stop and recheck connections.
Choosing the Right LED Strip Lights for Ceiling Use
Choosing the right LED strip for ceiling lighting depends on room size, usage, and personal style. Bedrooms benefit from warm white LED strip lighting, while kitchens often need cool white LED strip brightness for visibility.
RGB LED strip lights are ideal for entertainment rooms. High LED density per meter improves light uniformity. A high CRI LED strip is best for areas where color accuracy matters, such as living rooms and kitchens.
According to U.S. energy studies, LED strip lights consume up to 80 percent less energy than traditional lighting while lasting five times longer.
Selecting the Best Power Supply for LED Strip Lights
Understanding how many watts power adapter for LED strip setups need prevents flickering and damage. Oversizing the adapter slightly improves stability and lifespan.
Waterproof power supplies are recommended for garages, bathrooms, and outdoor ceilings. These units protect against humidity and voltage fluctuation.
Experts often say, “A quality power supply protects your entire lighting investment.”
Common Mistakes to Avoid When Installing LED Strip Lights
A small case study highlights this clearly. A homeowner in Texas installed ceiling LED strip lighting without calculating wattage. The lights flickered and failed within weeks. After upgrading the LED power adapter and improving ventilation, the system worked perfectly for years.
Most problems come from poor planning, weak power supplies, or ignoring waterproof needs. Following LED strip installation tips avoids these issues.
Conclusion
LED strip lights are one of the easiest ways to upgrade ceiling lighting. With proper planning, correct voltage selection, and quality components, they create beautiful ambient ceiling lighting that lasts for years. Understanding brightness, color temperature, power needs, and safety rules ensures success for any ceiling LED strip installation.
Alex Morgan is a passionate writer delivers accurate and well-researched content on celebrity net worth, age, biography, and career insights.